![]()
![]()
In this article you will learn how to deploy a React/Vue Web Application on the cPanel web hosting control panel. This tutorial will guide you step by step on how to deploy and host your React/Vue Web App.
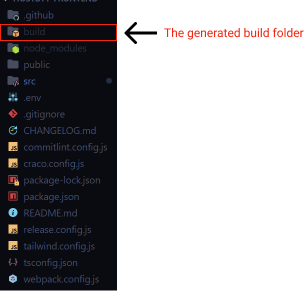
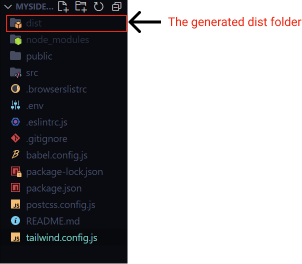
First run 'npm run build', or 'yarn build' if using yarn, on your terminal where you have been developing the web app. This will generate a build (React) or dist (Vue) directory/folder at the root of your project.
You can preview your production build locally by running:
npm install -g serve
serve -s dist
If you do come across this error bash: serve: command not found, you may run the following command:
#for React project
npx serve -s build

#for Vue project
npx serve -s dist

#you can even specify the port to use by adding the -p flag followed by the port number
npx serve -s build -p 4000
The build or dist folder should be compressed to a zip file on your local machine. This allows for easy upload to cPanel.
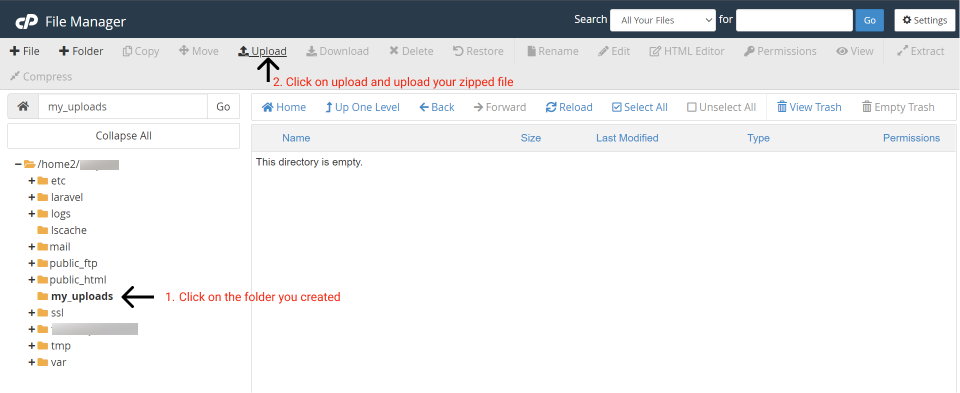
Log into your cPanel account and head over to file manager and open the file manager.

On the file manager create a new folder on the root directory and add a name to it (in this case we have named ours 'my_uploads') and click on the newly created folder. You can use this folder to upload all the folders you want to upload onto your account.
Upload your compressed build zip file to the folder you just created.
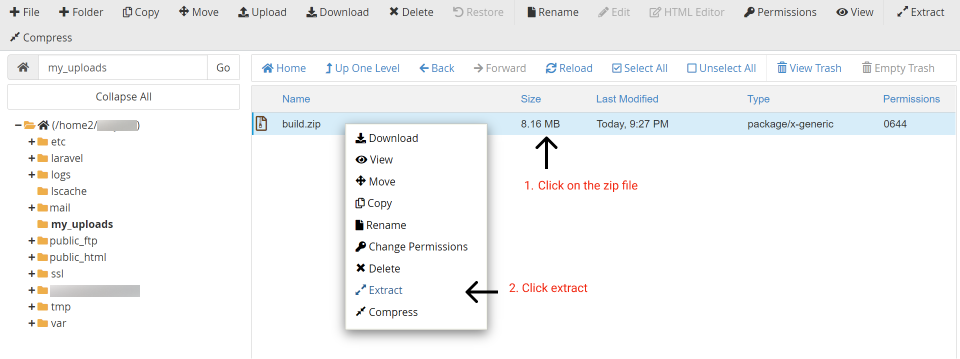
Extract the files by right clicking on the zip file. Extract them in the same folder you created in the step above.
NB: if this was a Vue project the folder will be /my_uploads/dist.zip
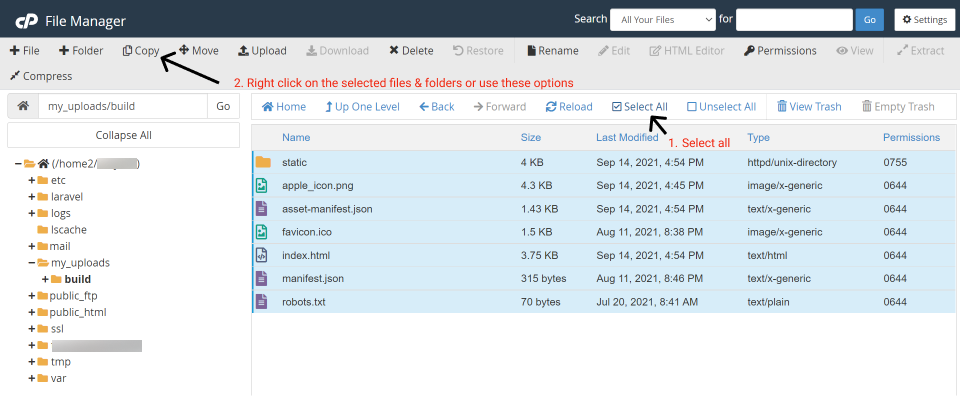
Open the extracted folder and click on the select all tab to select all the files. Right click on the files and click copy (you may choose to move the selected files).
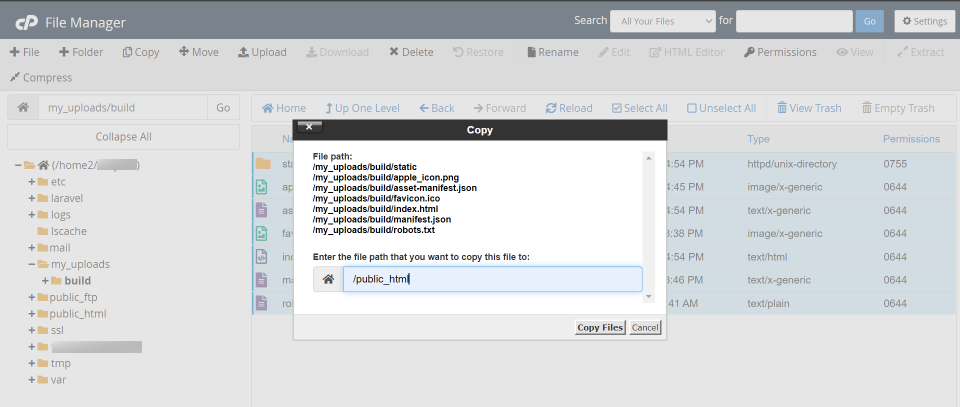
Change the path to be /public_html (assuming that the web app is for your main domain) or /subdomain.domain.com only if you had created a subdomain via cPanel (replace the 'subdomain.domain.com' with the name of the subdomain folder that was created when you created a subdomain via the cPanel control panel).
You may choose to delete the 'my_uploads' folder (you can just delete its contents and use the folder for any future uploads).
If you use routers that use the HTML5 pushState history API under the hood (for example, React Router with browserHistory), many static file servers will fail. For example, if you used React Router with a route for /todos/42, the development server will respond to localhost:3000/todos/42 properly, but an Express serving a production build as above will not.
This is because when there is a fresh page load for a /todos/42, the server looks for the file build/todos/42 and does not find it.
This is also similar in Vue using Vue Router in history mode, a simple static file server will fail. For example, if you used Vue Router with a route for /todos/42, the dev server has been configured to respond to localhost:3000/todos/42 properly, but a simple static server serving a production build will respond with a 404 instead.
To fix that, the server needs to be configured to respond to a request to /todos/42 by serving index.html (and any other requests that do not match a static file).
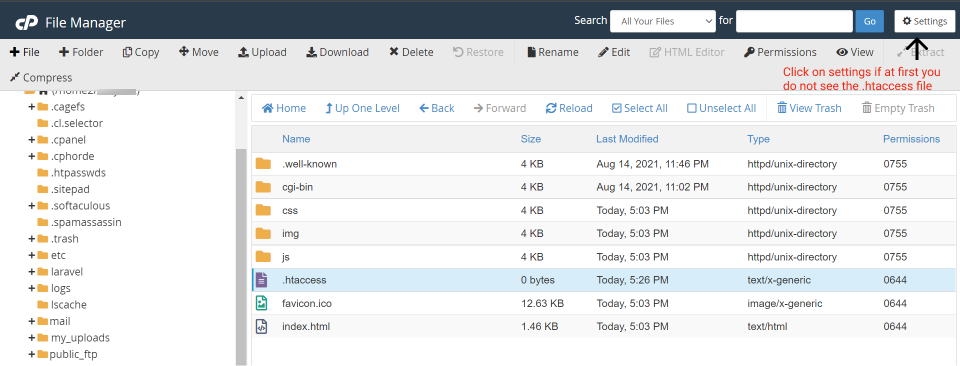
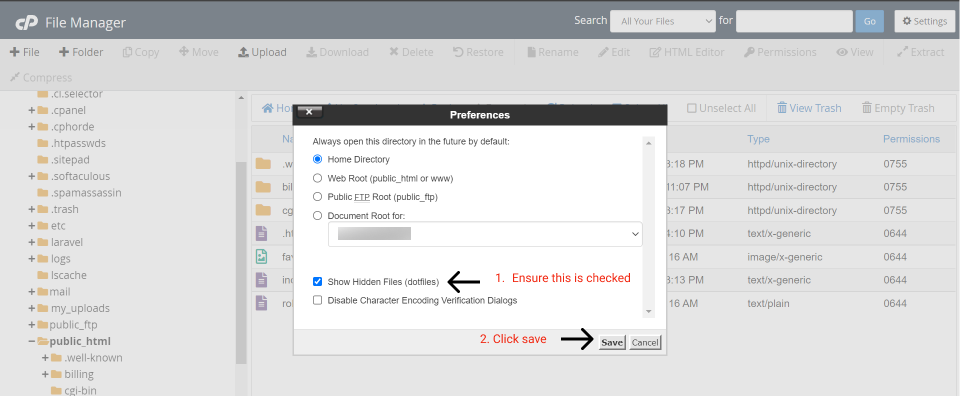
First, check whether you have the .htaccess file in the /public_html or your subdomain folder /subdomain.domain.com (the .htaccess file is a hidden file, therefore, ensure that you have toggled on the option to view your hidden files by selecting settings found at the top right of the file manager).
If you do not have the file even after choosing to show hidden files, create it by selecting the + File button at the top left of the file manager and name the file .htaccess.
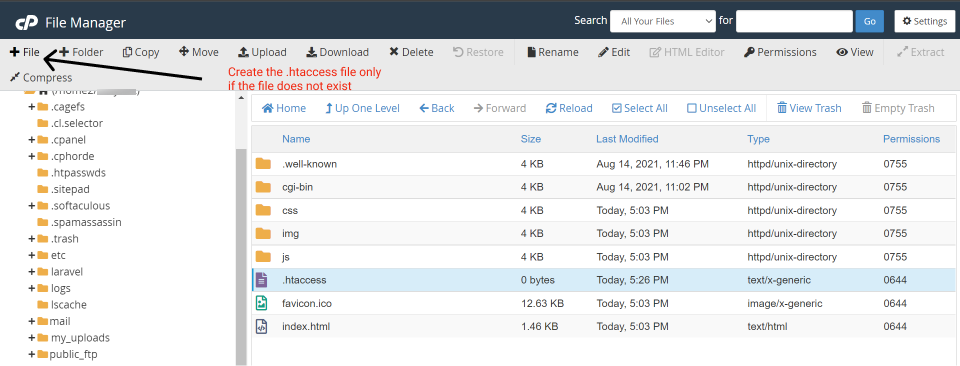
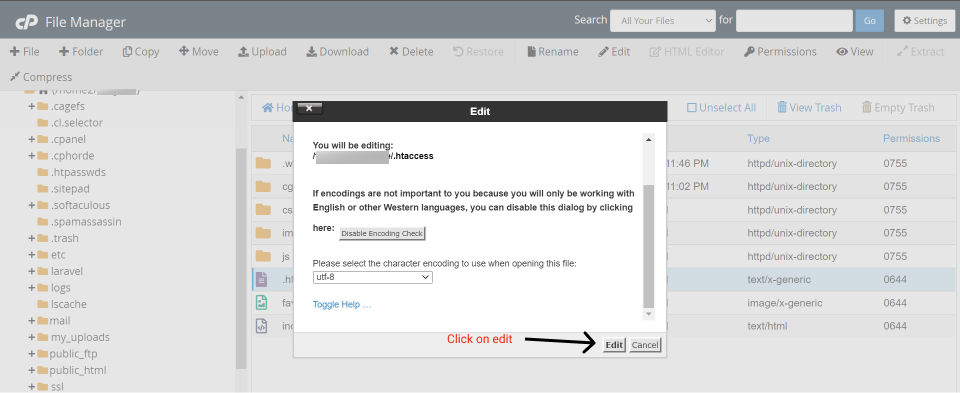
Click on the .htaccess file then click on edit:

Add the following to it:
Options -MultiViews
RewriteEngine On
RewriteCond %{REQUEST_FILENAME} !-f
RewriteRule ^ index.html [QSA,L]

Add the following to it:
<IfModule mod_rewrite.c>
  RewriteEngine On
  RewriteBase /
  RewriteRule ^index\.html$ - [L]
  RewriteCond %{REQUEST_FILENAME} !-f
  RewriteCond %{REQUEST_FILENAME} !-d
  RewriteRule . /index.html [L]
</IfModule>

You can enter your URL on your browser to check whether everything is ok.
For more information on deploying React Web Applications visit Create React App Documentation. For more information on deploying Vue.js Web Applications visit Vue CLI Documentation.
If you have any issues or if you need any assistance you can let me know in the comments section or send me an email here hello@brianmulaa.com.